By now, you've acquired all the essential knowledge required to execute nf-core pipelines. In summary, the process involves installing the necessary dependencies (Nextflow, Docker/Singularity/Conda), reviewing the pipeline documentation to grasp the specific parameters relevant to your task, and then running it like in this example:
nextflow run nf-core/rnaseq -profile singularity \
--input 'input_data/*.fastq.gz' \
--outdir results
--genome GRCh38
The above command will download the rnaseq pipeline code (from nf-core) and the required software (from singularity) and will execute the pipeline on the local system.
Config file
One of the problems with the command above is that the jobs will be run locally on the head node, which is considered poor practice. You should always submit your jobs to the queue. To ensure proper job submission, you can create a configuration file and configure it to instruct nextflow to route all pipeline jobs through the queue system. Once you have created this configuration file, you can incorporate it into the command above using the -c argument, e.g.:
nextflow run nf-core/rnaseq -profile singularity \
-c myconfig.txt \
--input 'input_data/*.fastq.gz' \
--outdir results \
--genome GRCh38
You can refer to the Nextflow documentation for detailed instructions on configuring config files.
However, for added convenience, you have the option to use the institutional UCL config file provided within nf-core. This is a very general and basic config, but accomplishes two essential tasks: instructs Nextflow to use singularity and to submit jobs to the queue. To use this config, you can include it as a profile like this:
nextflow run nf-core/rnaseq -profile ucl_myriad \
--input 'input_data/*.fastq.gz' \
--outdir results \
--genome GRCh38
However, it's worth noting that while the institutional UCL configuration addresses these two important aspects (singularity integration and the queue system), it's not pipeline-specific. In other words, each pipeline operates with the default configuration and resource allocations (memory, time, CPUs) established by nf-core for that specific pipeline. These defaults resource allocations may not align optimally with Myriad's resource policies, and the general institutional profile does not address that.
For instance, suppose nf-core assigns a default of 72 hours of runtime and 2 CPU cores to a process like BWA in the nf-core/rnaseq pipeline. In such a case, this configuration would be in conflict with Myriad's policies (Myriad allows 2 cores for 48 hours, or 1 core for 72 hours, but not 2 cores for 72 hours), and therefore the BWA process will not be run.
By creating a pipeline-specific configuration, you gain the flexibility to fine-tune resource allocations and tailor the pipeline to Myriad's specific requirements and policies.
How to run nf-core pipelines already installed in Myriad
Running nf-core pipelines that are pre-installed on Myriad is designed to make the process even more user-friendly. This installation eliminates the need for users to handle various tasks such as downloading code, managing reference genomes, or allocating resources in pipeline-specific configs.
Of course, you are not obligated to use these pre-installed pipelines; you can continue to run pipelines directly from nf-core on Myriad, following the instructions provided earlier. However, if you're still not entirely comfortable with running tasks on the cluster or using nf-core and Nextflow, this option may be more straightforward for you. The pipelines we have installed are ones that we use internally or have been requested by UCL collaborators to facilitate their work. If there is one particular pipeline that you would like us to install, please drop us an email.
The process we follow to install nf-core pipelines is straightforward:
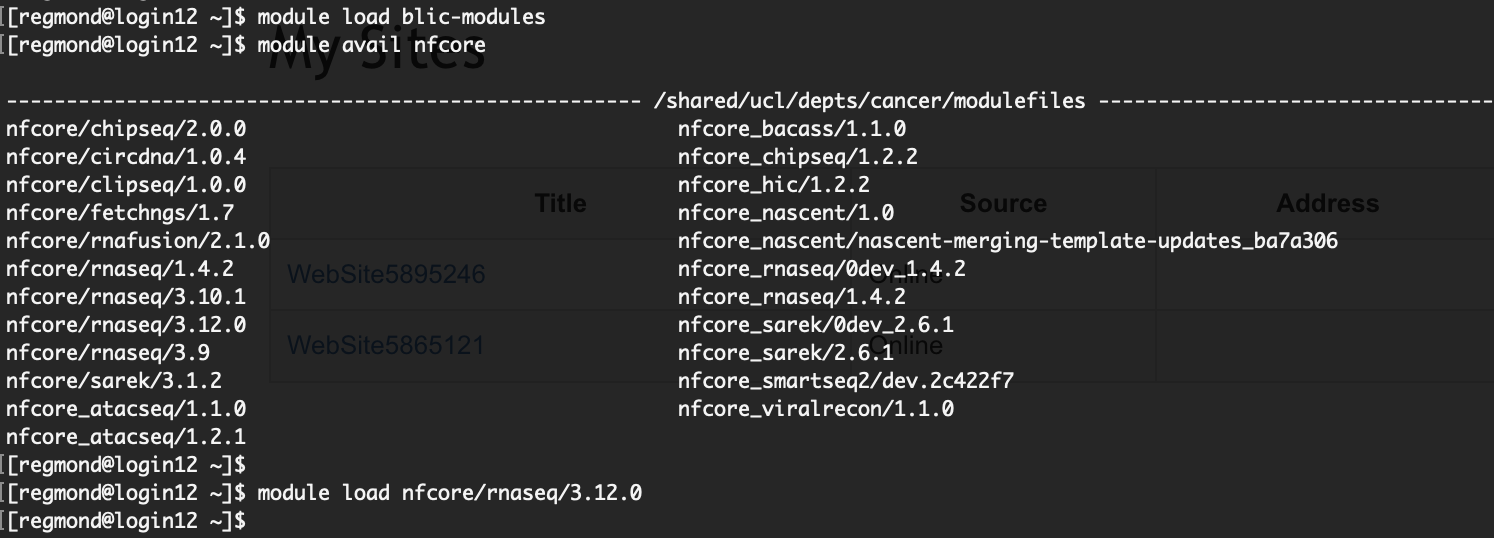
To explore the complete list of installed pipelines, load the blic-modules module and employ the "module avail" command while searching for "nf-core."
To start using a specific pipeline, you can simply load it by employing the "module load <pipeline>
After loading the pipeline, it becomes readily available for use. To initiate its execution, simply use the "nfcore_<pipeline>
For comprehensive information on the arguments accepted by the pipeline, you can execute the pipeline with the "--help" argument (e.g., nfcore_rnaseq --help).
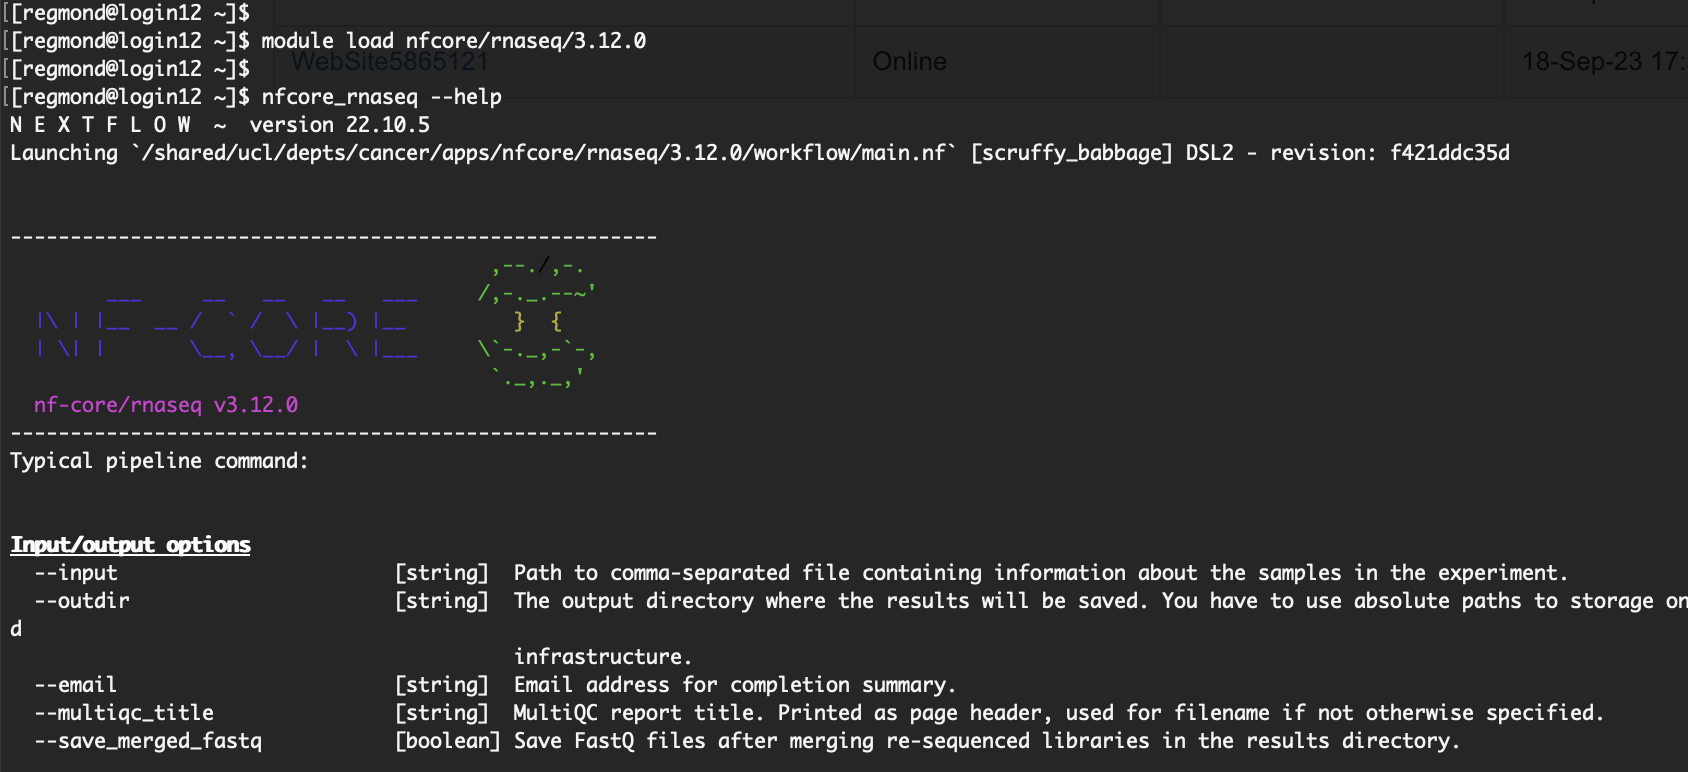
To clarify, once a pipeline is loaded, you dont' need to use "nextflow run". The "nfcore_<pipeline>
nextflow run /path/to/rnaseq/pipeline -profile /path/to/ rnaseq/config [ARGS]
You would just do
nfcore_rnaseq [ARGS]
#!/bin/bash -l
#$ -S /bin/bash
#$ -l h_rt=48:0:0
#$ -l mem=10G
#$ -l tmpfs=10G
#$ -pe smp 1
#$ -N
#$ -wd /path/to/project
shopt -s expand_aliases
module load blic-modules
module load nfcore/rnaseq/3.10.1
nfcore_rnaseq \
--input 'inputfile.csv' \
--outdir results \
--genome GRCh38 \
-resume \
-with-tower
This is the most obvious and important tip. Before you run any pipeline, you need to read carefully the specific pipeline documentation, as each nf-core pipeline have specific arguments, input data requirements, and output formats. Familiarizing yourself with the pipeline's output format and structure will help you interpret the results and extract meaningful insights from your data. At the very least, make sure to check the pipeline's README and usage instructions to get a quick overview of its functionality and requirements.
As you can see in the example qsub script above, we have added the "shopt -s expand_aliases" shell option in the script. You need to add this option of you run one of the installed pipelines within a qsub script. This is becasue as explained before, the "nfcore_pipeline" commands are aliases, so if the shell is not interactive, the alias needfs to be “expanded” for the script to understand it. You dont need to do this is you are running the nfcore_pipeline commands directly in the command line
When creating a qsub script to execute a Nextflow pipeline, as shown above, it's not necessary to request excessive memory or more than one CPU. The qsub script primarily serves as the runner for Nextflow, which acts as a job controller responsible for submitting various tasks (such as fastqc, trim_galore, STAR, etc.) to the queue.
This 'controller' job is typically not computationally intensive, so excessive resource allocation can result in unnecessary queue wait times lasting hours. The individual processes managed by Nextflow (e.g., fastqc, trim_galore, STAR) will be dispatched to other nodes with resource allocations specified in the internal configuration file. Therefore, you need not be concerned with manually allocating resources to these jobs. In fact, it is advisable to avoid using specific computer resource arguments (e.g., --max_cpus or --max_time) in your script unless you really understand how the resource allocation for that particular pipeline has been set up
We strongly recomend that you get used to run your nextflow jobs always with the “-resume” argument, so that in case the pipeline fails, you can resubmit it again and it will pick up from where it left. If for whatever reason the pipeline stops running at some point and you resubmit without that argument, the pipeline will restart from the start.
Related to the -resume argument, we recommend that you do not work in $TMPDIR, i.e., do not add "cd $TMPDIR" in your qsub script, as that might prevent the -resume argument to work properly.
We also strongly recommend that you always use the “-with-tower” argument. For this argument to work, you first need to create set it up in nextflow tower. Nextflow Tower is a platform that provides a graphical user interface for managing and monitoring Nextflow workflows, so you can use it to track your pipelines in the web at real time, and it’s really useful for troubleshooting is there were any issues during the pipeline execution. Just open an account and follow the instractions to create a personal access token.
Another common mistake is to load a module for an nf-core pipeline, but then run it using "nextflow run nf-core/<pipeline>" instead of the nfcore_<pipeline> command..
I.e., if your qsub script looks like this:
module load blic-modules
module load nfcore/rnaseq/3.10.1
nextflow run nfcore/rnaseq [ARGS]
Then you are loading the module for the rnaseq pipeline that we installed in Myriad, but you are not using it. You are effectively loading the module but then downloading and running the pipeline directly from nf-core.
Please note there is nothing wrong with running the pipeline directly from nf-core as long as you are aware that that's the one you are running (and not the module) and run it with an appropiate config as discussed above.
Most of the time, when the pipeline fails with an "Process
XXX terminated for an unknown reason -- Likely it has been terminated by the external system”, this is usually a glitch and resubmitting the job (using the -resume argument to make sure that the pipeline doesn't start from the beginning) usually solves it.
If you have resubmitted a few times and still fails, then the next thing would be to check that the process has the right resources (time/mem/cpu) assigned. Although the config file that we installed contains appropiate resource allocations, there are occasions where we might need to optimise it (for example, if someone is running a pipeline with files that are bigger than usual we might need to increase the allocations). So if this is the case, contact us and we can look at this for you.
If the resource allocation is not the issue, then you will have to troubleshoot it, and usually that requires you to go to the work folder that failed and try to debug the issue based on what you see there. If any of this sounds unfamiliar to you (for example, what the work folder is), then we strongly suggest that you take a look at the Nextflow section before you continue using these pipelines. They do not always run smoothly, so it’s important to understand how they work to be able to troubleshoot them
While this is not directly related to nf-core or Nextflow, if you are transferring files from Windows or macOS to the cluster, we highly recommend running the 'dos2unix' command on these files. This ensures proper reformatting of line endings, which differ between Windows/Mac and Unix systems.
We've encountered situations where users requested assistance with pipelines, only to discover that the input files were improperly formatted. Line endings, in particular, have been a common source of such issues.